The story behind the piece
I've always been drawn to talismans. Objects imbued with meaning and power. Whether it's pagan symbolism or the energy of crystals, these little treasures have always felt like a connection to something greater.
When I was 16, my parents bought me a tarot card set: Tarot of the Cat People. As a cat lover, I was captivated by this deck. It wasn’t just cards; it was a world, rich with lore woven into every detail. Back then, my favourite card was Strength. It depicted a woman atop a leopard, symbolising the mastery of mental power over physical force... the idea that you can achieve anything if you put your mind to it.
As I’ve grown, my perspective has shifted. I now find myself drawn to The Hermit. Looking back at my younger years, filled with self-doubt and the heavy weight of figuring out life, I didn’t realise that I was doing fine.
The Hermit holds a lantern, lighting his own path. It’s a reminder that, even when things feel uncertain or overwhelming, we are our own guiding light. Reflecting on those times, I can see now that I was my own source of strength all along.
I wanted to create a piece of jewellery that wasn’t just an object; It had to be something more. I wanted to craft a talisman of self-discovery, resilience, and inner light. A reminder that no matter what, we carry the power to guide ourselves forward.
Step 1: Initial Design
To bring my ideas to life, I started with the pen tool in Photoshop. I sketched out a few concepts: a hand holding a lantern, a lantern with a sparkle, and a lantern held up by a stick. In the end, I chose simplicity over detail and went with just the lantern.

Step 2: Bringing It Into 3D
Although I considered learning engraving or acid etching, it felt overwhelming. Instead, I decided to produce a rendering so it could be made into a 3D model and either cast by myself or by a company.
I exported my PSD file as an SVG and imported it into TinkerCAD.
This step was the biggest learning curve, and I learnt LOTS. I originally wanted to use my brand font, Rallia, but after some research, I discovered that its pointy edges could make the casting brittle. I needed a font with more rounded or blocky shapes. Similarly, I had to adjust the rays of light and the lantern edges to be more rounded. Unfortunately, this also meant I couldn’t include my sparkle logo element. I used my web-safe font I use for body text - Montserrat - for the text.
Cooksongold offer a casting service. Delft sand casting just wouldn't have given me the detail I needed. I wanted to use Cooksongold as I knew they were reputable after dealing with them for so many years; they're always super helpful and knowledgeable. I contacted them to ask if my dimensions would work.
They shared some invaluable advice:
- Engravings should be at least 0.3mm deep.
- Walls should be at least 0.4mm thick.
Since my piece had engravings on both sides, it needed to be a minimum of 1mm thick. Thankfully, TinkerCAD made it easy to import, adjust sizes, and specify the design as engravings.
Before I sent it off, I printed out mockups to check the size if it felt comfortable to wear.

Step 3: Back from the casters!
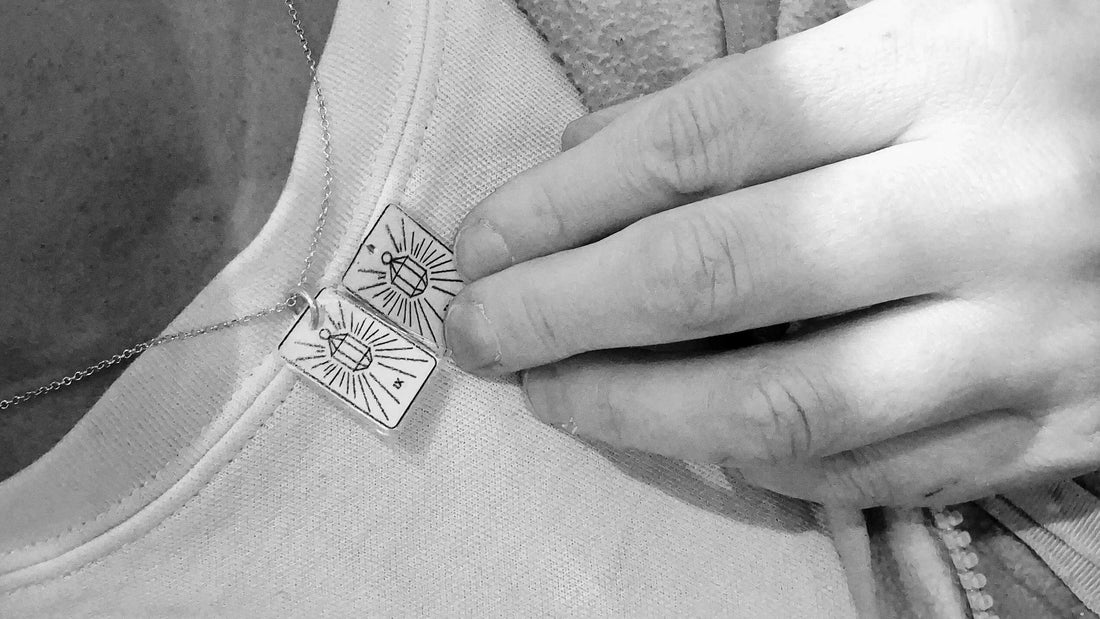
With my design finalised, I sent it off to be cast. When it arrived back, I was shocked at how successful the casting had been. Now, I'll need to add some liver of Sulfur to darken the detail, attach a bail and set a stone in the middle of the lantern.


Look at that patina 😍
Little piece of advice here: Don't pay for polishing! I hadn't taken into consideration that I'd need to re-pickle and polish after soldering a jump ring and adding liver of sulfur, so I did waste a bit of money here.
Step 4: Oh no!
Stone set, detail emphasised and jump ring added. I plan to have these as a customisable product in the made to order section of my website - you choose the stone (a selection of sapphires) and you choose the alloy.
I originally chose to flush set the stone, but bodged the setting up. Taking the risk out; I decided to tube set the Sapphire instead, this would allow me to use a bit of Gold too and far less room for failure. I had to change a few things at this step to get the design feeling right. Originally I soldered a basic jump ring on but it just didn't feel right and felt flimsy. The Belcher chain I had in stock was too dainty too; I chose to pair it with a chonky curb chain instead.
Step 5: Finishing touches

Do you have a talisman or symbol that’s meaningful to you? I’d love to hear your story. 💡✨